Posts Tagged ‘closet doors’
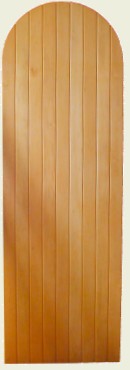
Arched Tongue & Groove Door
Tongue & Groove vs Beadboard for Shutters and Doors
While we are all familiar with flat and raised panel shutters and doors there are other choices when you are looking for something solid. Two popular alternatives are Beadboard and Tongue & Groove.
|
Profile of Beadboard |
Profile of Tongue & Groove |
Tongue & Groove
The name Tongue & Groove actually refers to the way the boards join together. If you look at the images above you will see how one end has a slot milled in to the wood (the “groove”) while the other end is milled so that part sticks out (the “tongue”). To join the the boards the “tongue” on one piece slides in to the “groove” on the next piece. The design we mill has chamfered edges that give it the look of a “V” where two boards meet up. The nice thing about Tongue & Groove is that it can be milled on to most any thickness of wood so that doors (like the one to the left) or board & batten shutters can be made without any frame.

Door style 6162H with partial herringbone pattern
We also offer doors and shutters where the tongue & groove fits within a frame like our 6162H shown to the right. In this design instead of the tongue & groove running vertically we have it cut at an angle. This way when 2 shutters or doors are side by side they take on a Herrignbone pattern.

Style 6570 doors with Beadboard
Beadboard
Our Beadboard is really just a variation on Tongue & Groove. It uses the same joinery method, but instead of a “V” channel there is a 1/4″ diameter bead running vertically on each face of the wood. We tend to see more of the Beadboard design with cottage style homes where it is matched up to Beadboard paneling and wainscoting.
Boards vs Sheets
Something to point out is that our Beadboard and Tongue & Groove panels are double sides unlike most of what is available on the market today. Where the industry standard is to just mill a “V” channel or bead down the face of plywood we still prefer the more traditional method where each board is milled individually to give a more authentic look and feel.
If you are considering designs of exterior or interior doors and shutters that have Beadboard or Tongue & Groove, but are not sure which will work best for you please ask us. Give us a call, send us an email or start an online chat. We are happy to help.
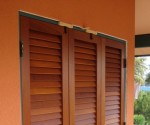
Spanish Cedar Louvered Doors covering an outdoor laundry for a home in Hawaii
Choosing Utility Closet Doors
When you are looking to buy new doors for a utility closet you need to consider both the requirements that any equipment in the closet might have as well as any other features you would like to see in the doors. Typically this means choosing styles of closet doors that allows the proper amount of airflow while keeping the sound down.
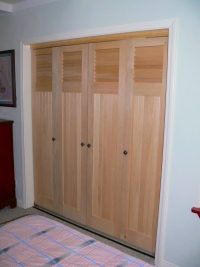
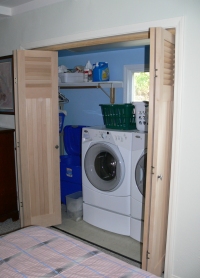
style 6162 - 12" of fixed Plantation louvers at the top allow for some ventilation while the rest of the door holds Tongue & Groove for sound reduction.
Utility Closet Doors with Airflow
Many pieces of equipment require a certain amount of airflow to make sure that they do not overheat. This Minimum Airflow will usually be listed in square inches (in²) on the equipment itself or in the owner’s manual. To provide airflow you have three options. The first option is to use one of our fixed louvered doors. As a rule the smaller the louver the more airflow. The next is to go with operable louvered doors. With operable louvered doors the larger the louver the greater the maximum airflow. These allow you to open the louvers fully for maximum airflow or to close them up to provide some sound insulation. The third option is to go with one of our closet door designs with removable trim but instead of using glass or mirror use a decorative wire mesh.
Utility Closet Doors with Sound Reduction
In some cases you are looking to minimize the sound as much as possible. This is easily achieved by going with panel doors, tongue & groove doors or some other type of solid design. You can also use faux louvered doors to match any other louvered doors and shutters in your home. Depending on the equipment you have in the utility closet you may want a combination of sound proofing and airflow. For situations like this we offer a line of doors that have 12″ of louvers at the top for ventilation while the rest of the door is tongue & groove to provide sound reduction.
If you are not sure which designs of closet doors will work best for you please ask us. Give us a call, send us an email or start an online chat. We are happy to help.
Closet & Door Openings Not Square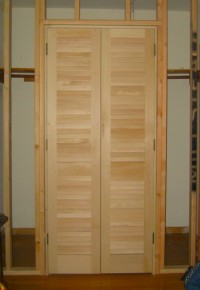
It is not uncommon to have the openings for interior doors or closet doors be out of square. The reasons could be anything from the house settling to an uneven floor to stud walls and header being twisted. The good news is that in most cases it is easy to work around these issues.
Rough Openings vs Finished Openings
If the opening for your doors is still rough (not framed out) then it really does not matter if your opening is square or not. When you frame out the opening you will have a chance to square everything up. This is also the case if you are installing pocket doors. If you are not sure if your door openings are rough or not here is an earlier post that explains the difference. Interior Doors: A Rough Opening vs. A Finished Opening
Measuring for your Doors
The first thing you will want to do is measure the framed opening where you want your doors. It is a good idea to measure the width and height in a few different places. This will help to show you where, if at all, your framed opening is out of square. Another check is to measure diagonally across the opening. If the measurement from the top left corner to the bottom right corner is the same as the measurement from the bottom left corner to the top right corner then your framed opening is square. Here is a link to our site on How to Measure for Doors which will help. If you do find that your framed opening is not square there are ways to work around this.
Uneven Header
If you the header dips to one side or another, or if it has a “bump” in the middle there are a few things you can do. You can try and correct it be removing and re-installing the header. Most likely this will be more difficult and time consuming than the alternative. If you are installing sliding closet doors or bifold doors you can simply shim out the track to make it level. Any resulting gap can be easily covered with a valence or corner moulding. If you are installing hinged doors you have a choice. If the header only dips an 1/8″ or so you may just want to leave it be. However, if the gap is more noticeable you should consider removing the door casing and straightening the door jamb.
Uneven Floor
If your floor is uneven there is not too much that you can do other than rip up and lay down a new floor. Thankfully an uneven floor will not affect the way your doors work. It will just mean that you have more of a gap at one end of the bottom than at the other.
Side Jambs not Plumb
If your house has settled you will mostly likely find that the side jambs will not be plumb. You will treat this similar to how it was explained with the uneven header above; let it be if the gap is small or remove the casing and re-plumb the jamb. If you installing sliding closet doors or bifold doors the simplest thing to do is to let the gap stay and then apply a simple quarter round or corner moulding right in front of the doors along the side jambs. This will hide the gap and not interfere with the way the doors open and close.
Hopefully this post has been helpful. If you still have questions on how to work with your non-square openings for your doors just ask. Give us a call, send us an email or start an online chat. We are happy to help. ![]()
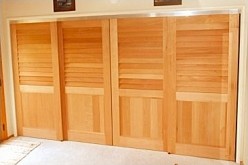
Spanish Cedar Sliding Closet Doors
Track Hardware for Sliding Closet Doors
When it comes to choosing track hardware for your sliding closet doors the main decision is really about how many individual doors do you want on each track. Your options vary somewhat depending on whether you are going with 2, 3 or 4 sliding doors to cover your closet.
Applications with 2 Sliding Closet Doors
If you have 2 doors covering your closet then you have a choice of a 2 track system or a wall mount system. With the standard 2 track system (figure 1) the doors slide back and forth within the opening so you can access half of your closet at any one time. With the wall mount (figure 2) you have full access to the closet however you need to have clear wall space for the doors to slide.

figure 1: Sliding Door Hardware - 2 Doors on 2 Tracks

figure 2: Sliding Door Hardware - 2 Doors on 1 Wall Mounted Track
Applications with 3 Sliding Closet Doors
With 3 doors covering your closet you can choose either a 2 track or 3 track system. With the 2 track system (figure 3) you will have 1 door on 1 track and 2 doors on the other track. This means that you can only open up one third of your closet at any time. With the 3 track system (figure 4) each door has its own track so that you can slide and stack all 3 doors one behind the other. This allows you access to two thirds of the closet. Something to keep in mind is that if you go with a 3 track system you need to have enough depth in your header to hold all 3 doors. A standard wall built with 2x4s and a 4.1/2″+ jamb header is deep enough to accommodate 3 doors 1.1/4″ or 1.3/8″ thick. If you are using 1.3/4″ doors you will need a jamb header at least 5.1/2″ deep.

figure 3: Sliding Door Hardware - 3 Doors on 2 Tracks

figure 4: Sliding Door Hardware - 3 Doors on 3 Tracks
Applications with 4 Sliding Closet Doors
For 4 doors the most common layout that we see is a 2 track system (figure 5) with 2 doors on each track. This allows for half of the closet to be open at a time. The alternative is to have each door on its own track (figure 6). This would give you the most access to your closet however you will need to have walls built with 2×6 studs as a minimum.

figure 5: Sliding Door Hardware - 4 Doors on 2 Tracks

figure 6: Sliding Door Hardware - 4 Doors on 4 Tracks
Do you need a Bottom Track?
The commercial grade sliding door hardware that we offer is designed so that all of the weight is supported at the top. This means that a bottom track is used only to guide the doors and keep them from swinging front to back. On the standard 2 track system the bottom track is optional. You would really only need the bottom track if you are concerned about the doors being pushed front to back like you might have in certain commercial applications or if you had large pets. On sliding closet doors systems with 3 or more tracks a bottom guide track is already included.
Which Track Hardware is best for your Sliding Closet Doors?
What I always recommend to people when they are deciding on their track hardware is this. Stand in front of your closet and imagine how you will be using your closet. If you will only be using part of the closet at any one time then a 2 track system will probably work for you. If you prefer to have the closet open as much as possible while you look over everything and make a decision then having each door on its own track will be better for you. What it really comes down to is “which do you prefer?”
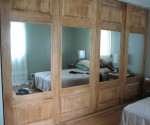
Sliding Closet Doors w/ Removable Mirrors
If you are still not sure which sliding closet door hardware will work for you let us help. Give us a call, send us an email or start an online chat. We are happy to help.
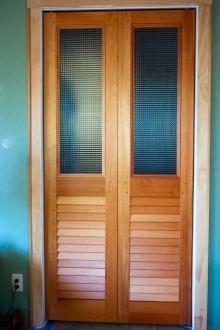 Here at Kestrel we make our custom sized interior doors and closet doors in three standard thicknesses; 1.1/4″, 1.3/8″ and 1.3/4″. Since we build all of our doors from solid wood using pegged, mortise and tenon joinery, the doors will be very sturdy regardless of the thickness. However, a thicker door will have added stability which is something to consider if you need over-sized doors. For most doors the main reason why you might choose one thickness over another is usually the hardware.
Pocket Doors
We sell different levels of track hardware with our pocket doors that can handle interior doors ranging from 3/4″ thick all the way up to 3″ thick. In most cases our standard 1.1/4″ thick doors will be what you want for your pocket doors. However, If you plan to add an optional pocket door lock you will need to go with 1.3/8″ or 1.3/4″ thick doors as the lock requires the extra thickness.
Hinged Doors
While there are hinges for any thickness of interior door most available double-sided handles and lock sets require interior doors that are 1.3/8″ or 1.3/4″ thick. It is best to choose your lock sets and handles first so that your doors can be made thicker if needed. If you plan to use a handle on one side of your doors only then 1.1/4″ will be thick enough.
Sliding Doors & Bifold Doors
The heavy duty, commercial grade track hardware we sell for bifold doors and sliding closet doors will work with individual doors ranging from 1.1/8″ up to 1.3/4″ thick. Almost all of the bifold doors and sliding doors that we make are 1.1/4″ since they rarely need a lock. If you are planning to add a lock we would recommend choosing that first in case you did need thicker doors.
Other Considerations
Beyond over-sized doors and the hardware there are a few other things to think about when it comes to the thickness of your doors. Will the doors be taking a fair amount of abuse like you might see in a public location? Do you want the look of your louvered doors to have more depth to them? Are you planning on using insulated glass in your doors? These are some of the other reasons why you may want to go with thicker doors. If you are still not sure please ask and we will work with you to find what thickness is best for your doors.